
How to build your new bike
Some tools are required!
To follow this guide correctly you will need certain tools:
Step 1
Unpack your Bike
When you get your bike, it will come in a large box with packaging attached to key areas. Take the bike out of the box carefully and stand the bike on the ground. Check the box for an accessories box that will have your pedals and manuals inside. Using the scissors, cut the cables ties and remove them from the bike. Next, take the foam and bubble wrap off the bike and place it in the box the bike arrived in. Once all the packaging has been removed you can now start the assembly process.
Step 2
Fit the front wheel
⚠
The wheels must be properly mounted to the bicycle frame and tightened. If the wheel is not securely mounted in the dropouts, it may come out when the bike is ridden, possibly causing injury to the rider.
To begin fitting the front wheel, you must identify what type of axle your bike comes with as they all have slightly different methods of fitting.
Thru-axle
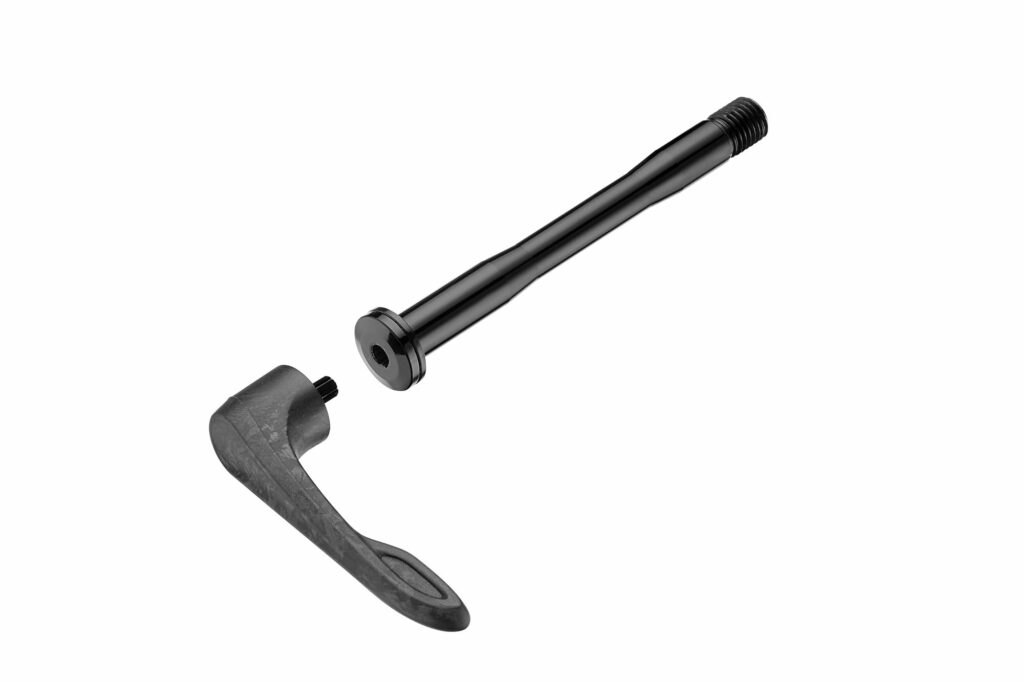
A thru-axle is the most common type of axle on most modern bikes. If your bike has one of these it self centres on the forks meaning there is no major alignment you need to do.
Begin by unscrewing it from the forks and place the wheel in the forks. You will need to align the front brake rotor with the brake pads.
If a plastic spacer is between the pads you will need to remove it first. When the plastic spacer is removed from the brake pads please ensure you do not pull on the brake lever.
Once the disc is aligned between the brake pads, and the wheel is pushed all the way up (so the hub is snugly in the fork) you can insert the axle through the forks and wheel, you may need to jiggle the wheel around a bit to allow the thru-axle to reach the other side of the forks.
⚠
When tightening the thru-axle, ensure there is no resistance. If you feel heavy resistance this could mean you are cross-threading your axle and forks! Sometimes it helps to rotate the thru-axle counter clockwise (as if you are removing the wheel) a couple of times, to ensure you are correctly placed on the threads.
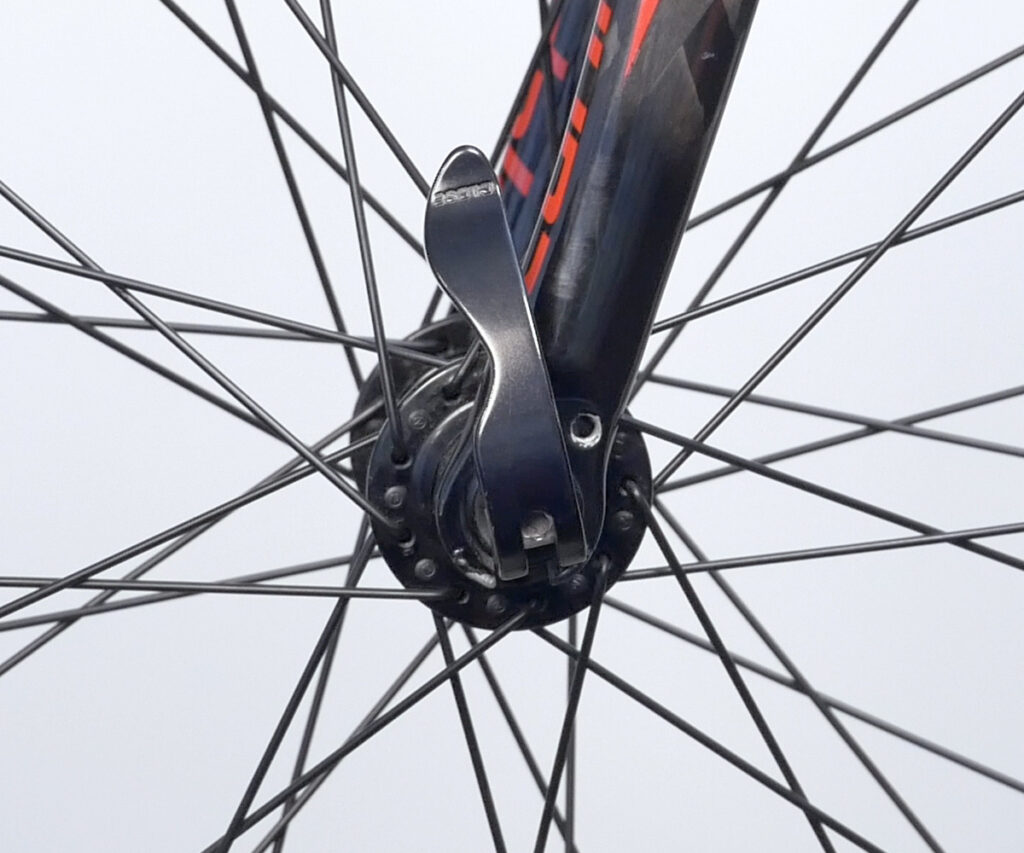
Quick Release
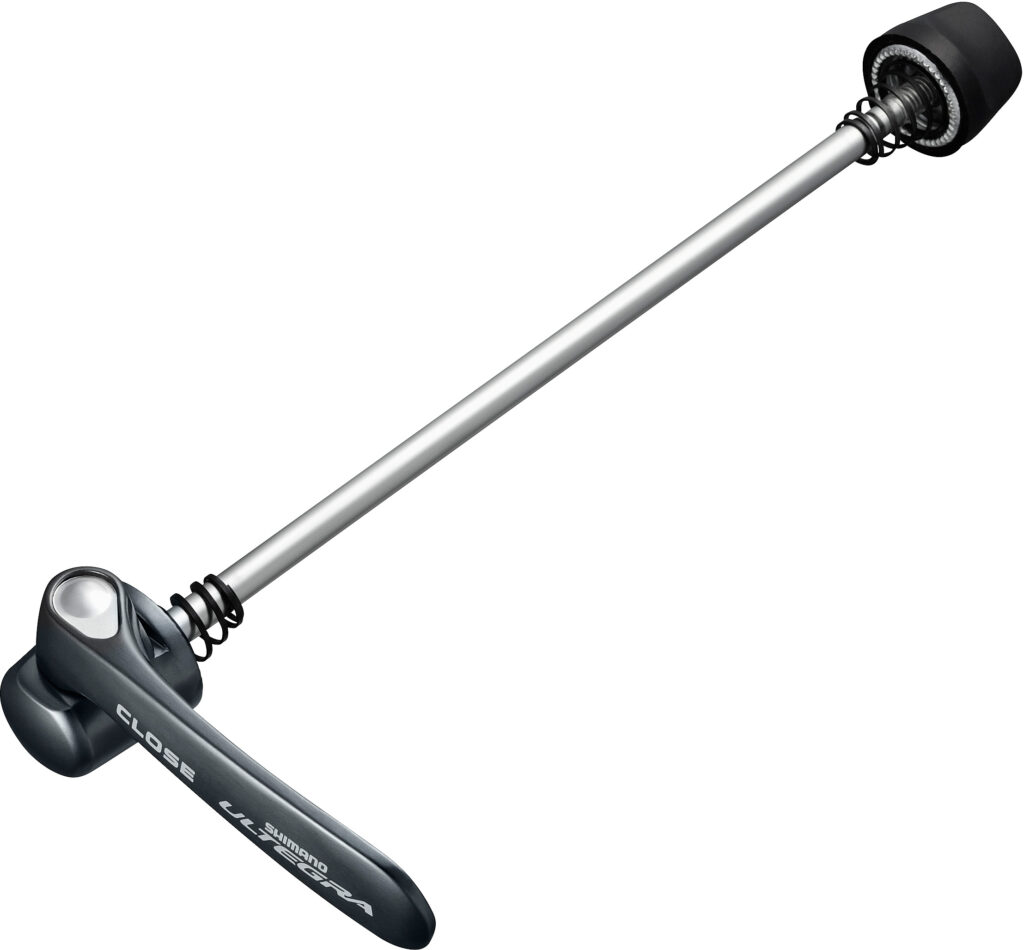
With quick release mechanisms, it is often easiest to install the front wheel when the bike is standing on the ground. The quick-release skewer must be fully engaged on the dropout surfaces. By placing the bike on the ground, the axle will be fully up in the dropouts.
Ensure you are fitting the wheel in the correct orientation, note directional arrows of tire manufacturer, if any. Directional arrows printed on the sidewalls indicate rotation of wheel. Not all tires have direction orientation.
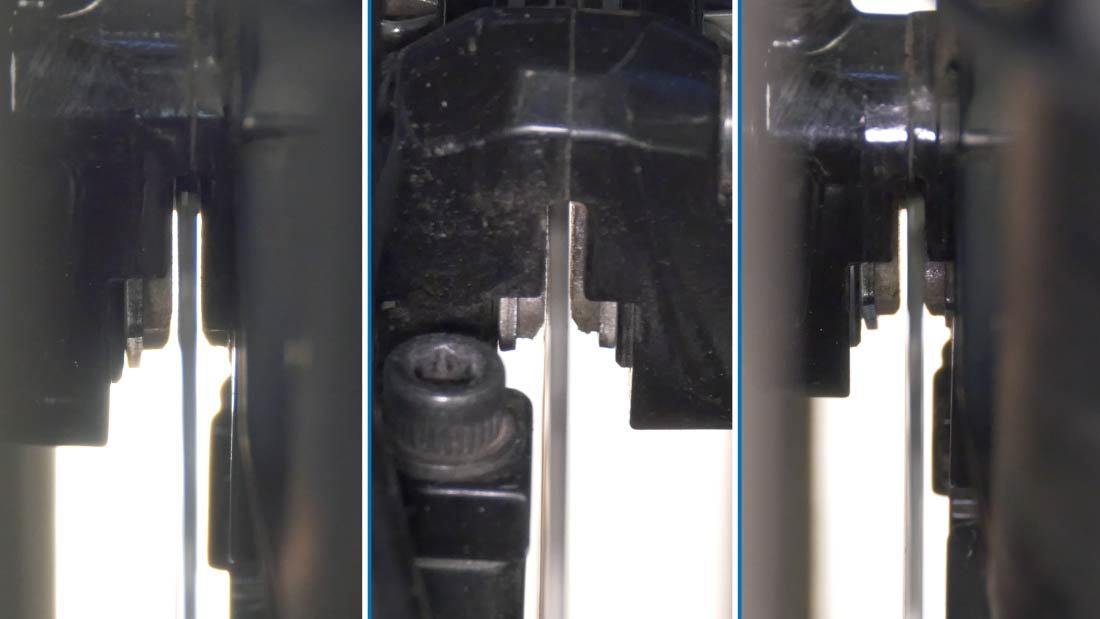
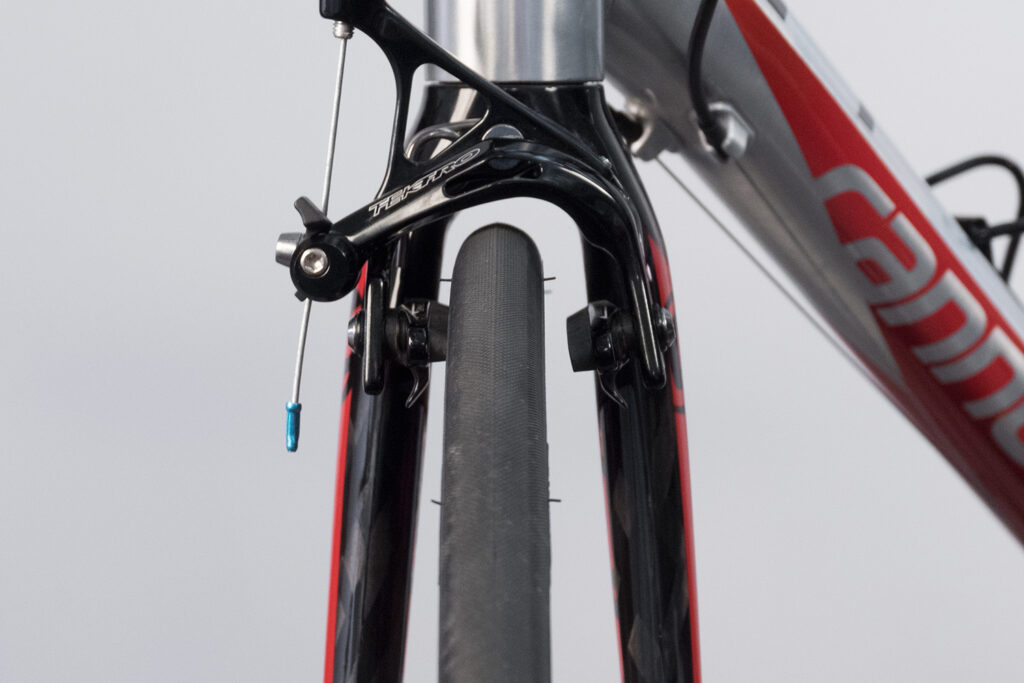
1. Before you begin, check that the quick-release skewer lever is in open position and that brake quick-release mechanism is open. Use the image below (courtesy of ParkTool) to check how to open the brake release.

2. Install the wheel into the dropouts, making sure the hub is fully seated in the fork.
3. Tighten the axle so that the lever meets resistance at 90° from the frame or fork.
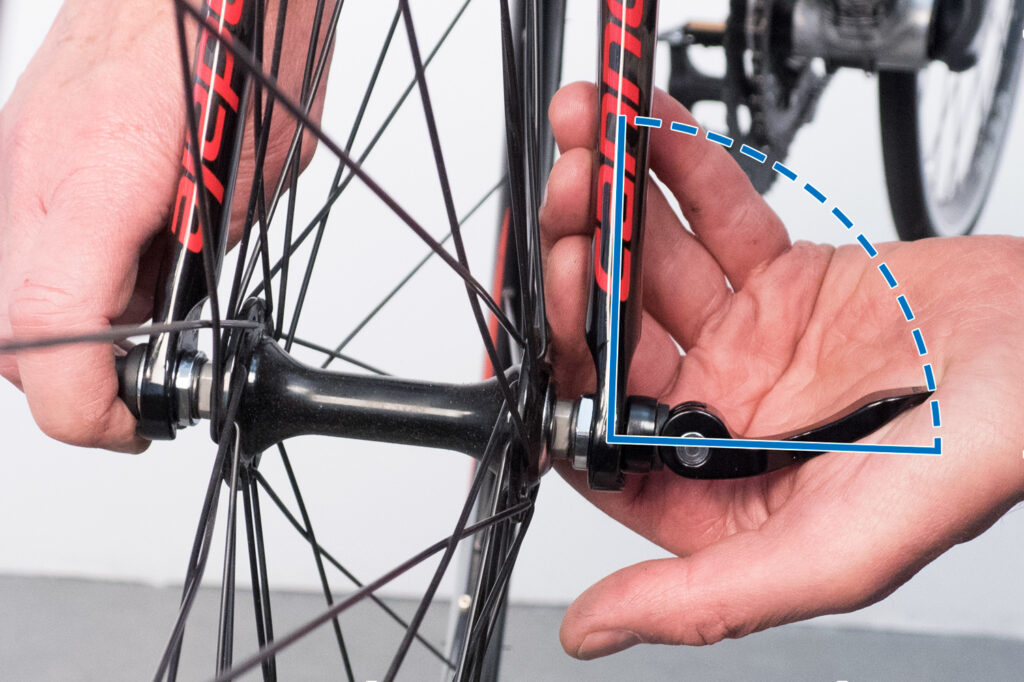
4. Determine final closing position of lever. Rotate front lever and adjusting nut so the lever will end up just in front of fork.
4. Re-engage brake release mechanism.
5. Verify that wheel is centered in frame or fork. Open skewer or loosen axle nuts and adjust as necessary to center wheel in frame, and re-tighten.
Step 3
Fit the handlebars
Depending on your bike, sometimes we may remove or simply twist the handlebars to aid in transport. What you should do varies on wether the handlebar was twisted or removed.
If the handlebars are removed:
ⓘ
Most stems require the faceplate bolts to be threaded in even amounts on the top and bottom. Some stems are an exception, and require you to thread in the top or bottom faceplate bolts all the way before tightening down the opposite side bolts. This style of stem is often labeled accordingly.
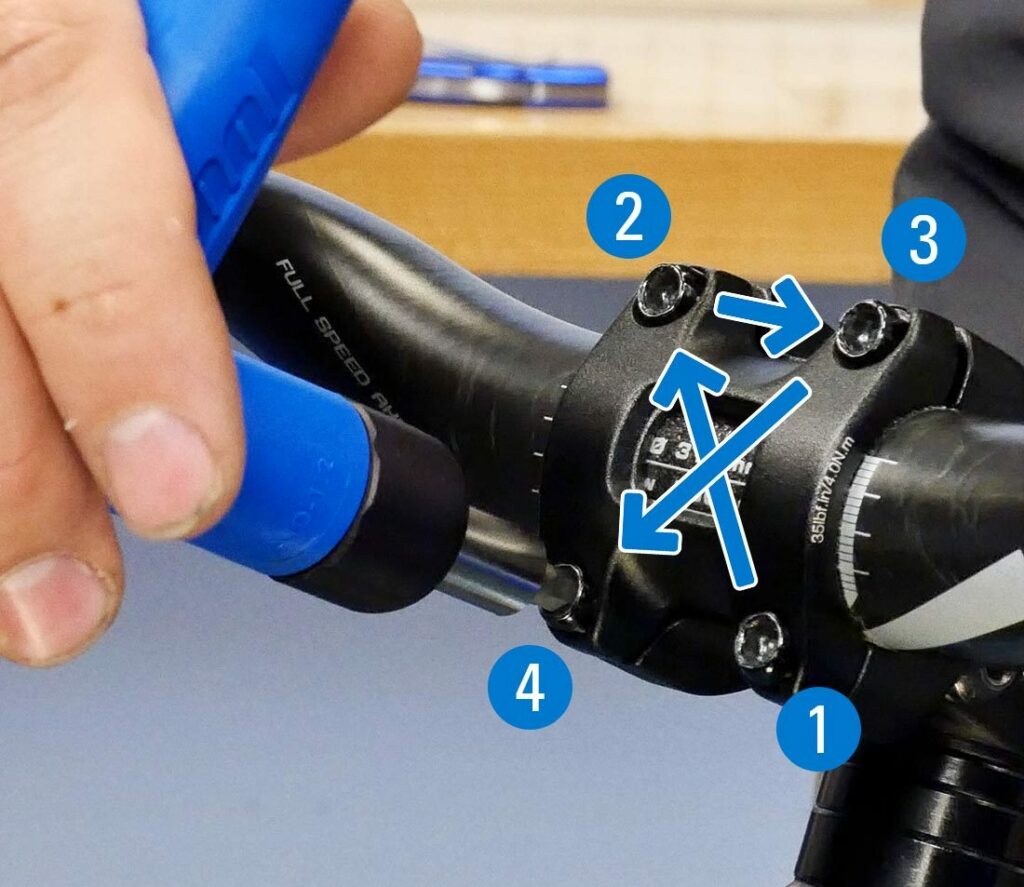
Place the bars in the stem. Place the faceplate over the bar and thread the bolts in evenly just enough to hold the bars in the stem. Ensure the handlebars are centred, most handlebars come with guides printed on the metal / carbon as a visual aid.
Tighten and torque the faceplate bolts to the appropriate specifications, these are usually printed on the stem or the faceplate (4/5/6nm). It is advised to tighten incrementally in a cross pattern to distribute the pressure equally.
If The Handlebars Are Twisted:
Twist the handlebars & stem so that they are centred then tighten the loose stem pinch bolts, they usually will require anywhere between 4/6nm but most stems will have the required amount printed on the side.
Step 4
Fit the pedals
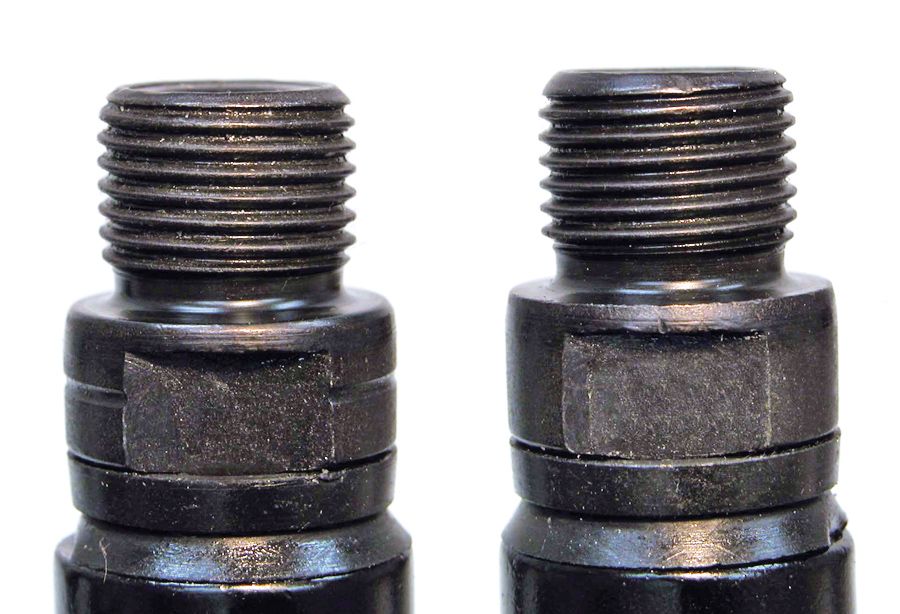
It is important to remember that pedal threads are different from left side and right side. The right side pedal has a right-hand thread (removes counterclockwise, installs clockwise). The left side pedal has a left-hand thread (removes clockwise, installs counterclockwise). Many pedals are stamped “L” and “R” for left and right. Additionally, the thread will appear to slope up toward its tightening direction. Left hand threads slope up to the left, while right hand threads slope up to the right, as seen below.
- Using fingers on wrench flats, thread right side pedal into right crank. Use wrench to snug pedal.
- Position wrench on flats for good mechanical advantage. Hold wrench with one hand while holding opposite crank with other. (Pedal the bike backward to install both left and right.)
- Using opposite arm as second lever, tighten pedal. Repeat process for left pedal, but threading pedal counter-clockwise to install.
⚠
If you notice excessive resistance check that you have identified the pedals and crank arms correctly and try again. Cross-threading the pedals will result in damaged threads, this is NOT covered by any warranty.
Step 5
Fit the seatpost
The seat post is fitted during the PDI process and will have either grease or fibre grip on it. Do not clean this off yet as it is used to stop the seat post from becoming stuck.
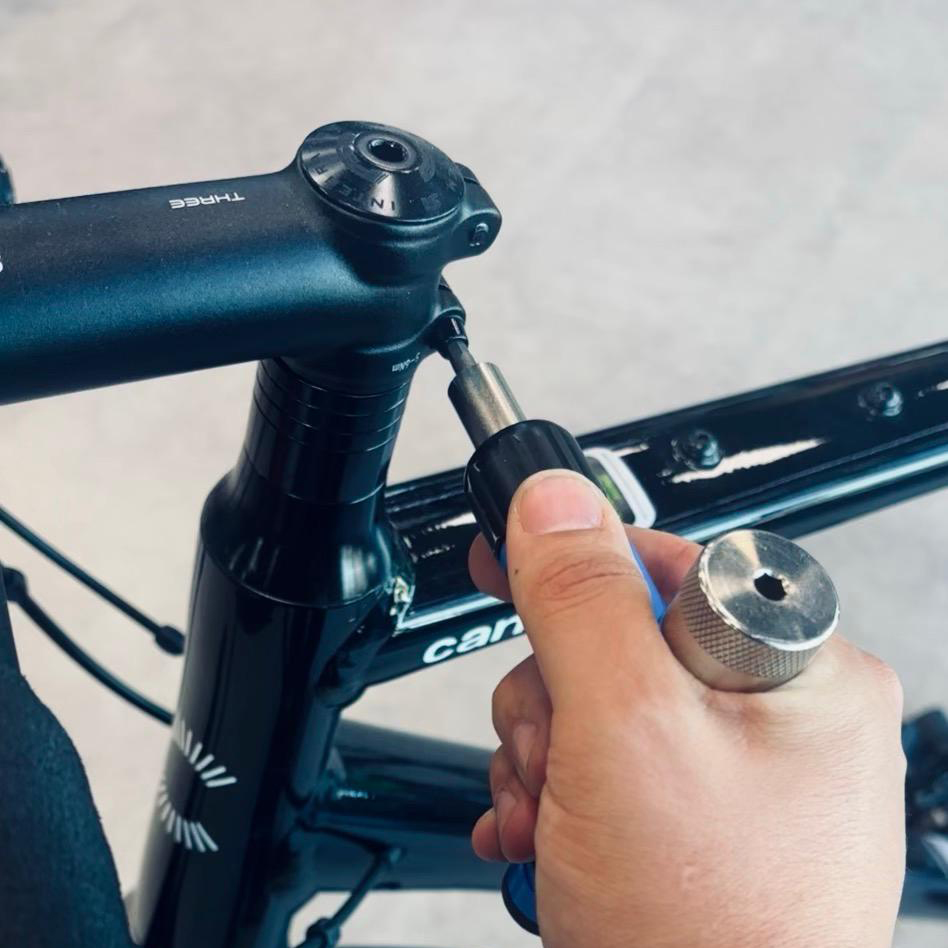
Place the seat post in the bike and push down gently. On the seat post, you will have a minimum insertion line. Make sure this is hidden in the frame before you tighten the seat clamp.
Tighten the seat clamp until you feel resistance 4-7NM. Some clamps will have a torque setting and should be adhered to.

Your seatpost may be different to the ones shown above. Park Tool has a great article that expands on more uncommon designs.
Step 6
Pump the tyres
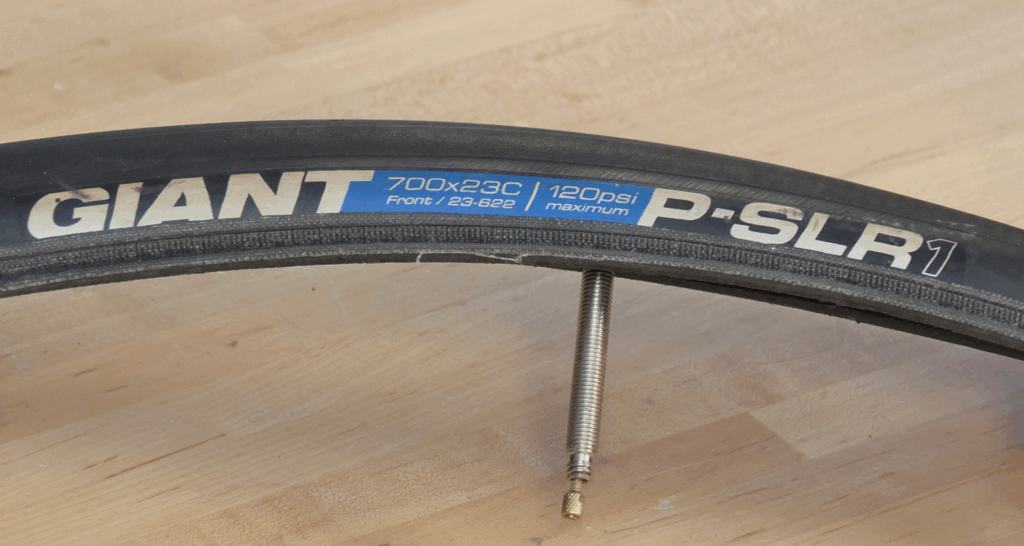
Tyres should already be pumped up, but it is always good to check to make sure they are pumped up correctly. Make sure your pump is set to the correct setting before you start pumping.
Check the side of the tyre to find the minimum and maximum pressure of the tyre. It should say “Maximum Pressure –PSI” or “Minimum Pressure –PSI”. This is the max and minimum and should not be exceeded.
COMPLETE
Your bike is ready to ride
Carry out a final preliminary check to ensure your bike is safe to ride. Keep in mind that if your bike has any cables they will stretch over the course of the next 6/8 weeks, this will lead to some adjustments needing to be made to your rear derailleur.
Once you notice changes to your shifting performance please contact us to arrange a check to be made to your bike.
ⓘ
Struggling with any of the steps or need advice? Contact Us.
Some images on this guide have come from ParkTool repair articles. All ownership resides with them.