

Tools you will need to build your brand new bike:
- Allen keys – 4,5 and 6mm or a multitool
- Screwdriver – flat head and phillips
- Spanner – 15mm
- Scissors

Unpack your bike
When you get your bike, it will come in a large box with packaging attached to key areas.
Take the bike out of the box carefully and stand the bike on the ground. Check the box for an accessories box that will have your pedals and manuals inside.
Using the scissors, cut the cables ties and remove them from the bike.
Next, take the foam and bubble wrap off the bike and place it in the box the bike arrived in.
Once all the packaging has been removed you can now start the assembly process.
The bike assembly process is split into 4 parts:
- Front wheel
- Handlebars
- Pedals
- Seat post
Install the front wheel
Before you put the front wheel into the bike make sure it is facing the right direction.
You can always make sure by 2 things:
Check the tyre tread is facing the right way, so the arrow is going in the way you are traveling. Or by looking at the sidewall of the tyre for a direction arrow.
Identify which type of axle you have:
If the wheels are bolted, unscrew the nuts on the ends.
If the wheel is quick-release undo the skewer enough to allow you to get it into the forks, it will be easier if you don’t take the skewer all the way out.
If the axle is a “thru-axle” unscrew it from the forks and place the wheel in the forks, when the wheel is lined up properly you can now insert the axle through the forks and wheel and tighten.
MAKE SURE THE WHEEL IS IN THE FORK DROPOUT CORRECTLY AND IS STRAIGHT IN THE FORKS.
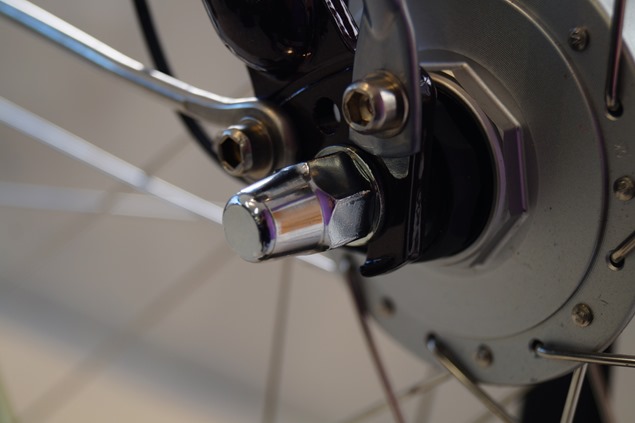
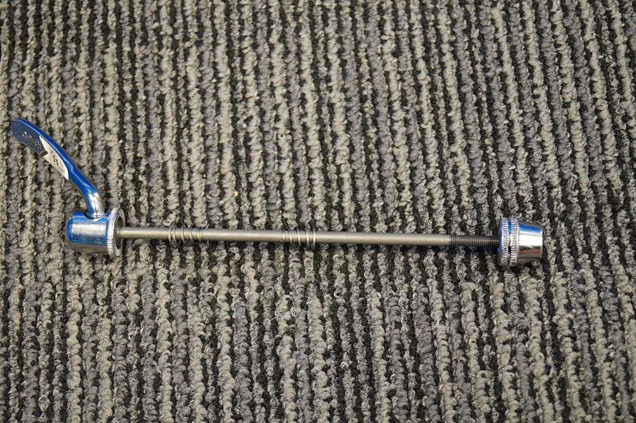
If the wheel is quick-release undo the skewer enough to allow you to get it into the forks, it will be easier if you don’t take the skewer all the way out.
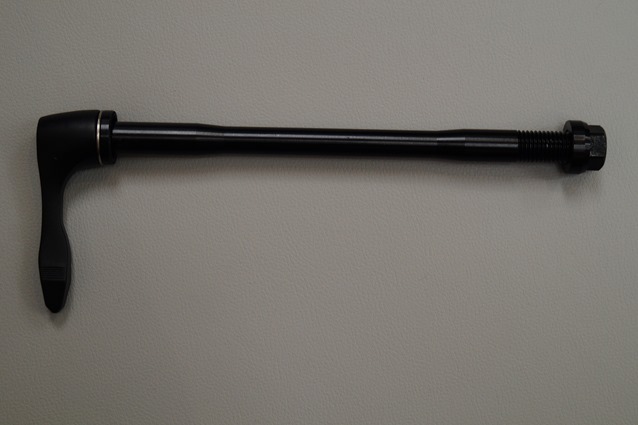
If the axle is a “thru-axle” unscrew it from the forks and place the wheel in the forks, when the wheel is lined up properly you can now insert the axle through the forks and wheel and tighten.
Check which type of brakes you have
When you put in the front wheel check out these little tips to help you out.
If you have disc brakes make sure the wheel is the right way round with the disc on the side of the caliper and make sure the disc slots in the caliper correctly.
If you have V-brakes, uncouple the brakes by holding the caliper arms and squeezing, this releases the cable and allows you to out the wheel in easier.
When you put the wheel back in pull the caliper arms together and slot the little silver mushroom-shaped part through the gap and make sure it sits firmly in place.
If you have a road bike with caliper brakes use the small lever to the left-hand side and flip it up, this loosens the brakes so you can get the wheel in easier. Make sure to flip it back down when you’ve put it in the wheel.
Handlebars
Put the bolts back into the holes that they came from and tighten down so that there is an even gap between the stem and faceplate.
Sometimes, especially on road bikes, the handlebars may be rotated for transit and need to be rotated to the correct riding position.
Loosen the bolts on the stem faceplate so that you can rotate the bars. Rotate the handlebars to the correct position.
For road bike drop bars, the top part of the drops behind the brake lever should be parallel to the ground
Flat handlebars are usually positioned correctly (with a slight rise and back-sweep) although you can rotate them slightly to find the most comfortable hand position.
Tighten the faceplate bolts gradually in a figure of eight patterns (across) to ensure you get even tension on all sides. Tighten the bolts until the bars are secure – torque settings are usually printed on the stem 4-7NM
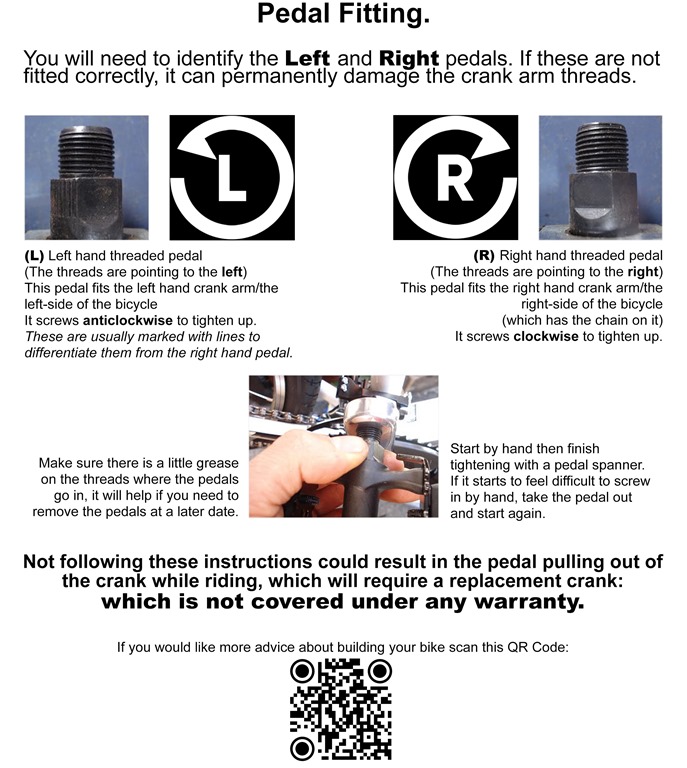
Fitting your pedals
Pedals are left/right specific. Failure to follow these instructions may cause damage and invalidate your guarantee.
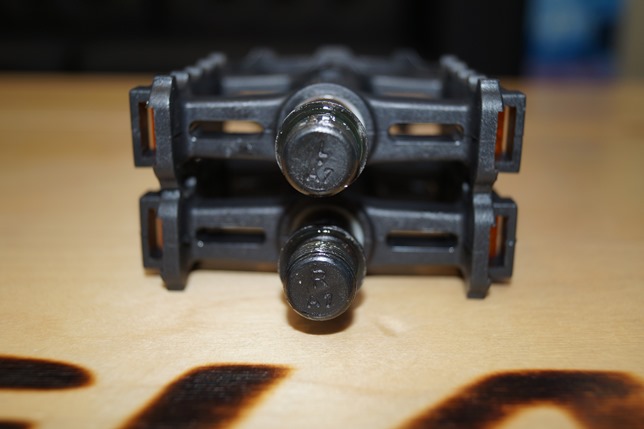
Identify the left and right pedals:
Identify the left and right cranks – The side with the chain and gears is the right-hand side
Look for the letter L or R stamped on the end of the axle or on the pedal body. It is important to identify the pedals correctly as the Left pedal has an anti-clockwise thread that will only fit on the Left crank while the Right pedal has a clockwise thread and will only fit on the Right crank.
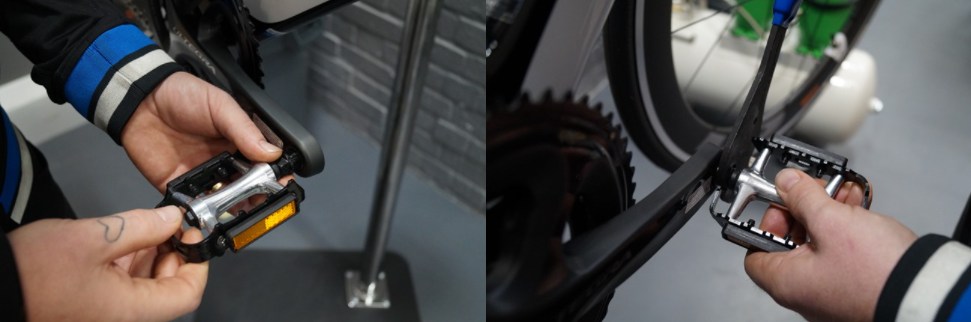
Put the pedal in slightly first, then turn the axle so that you tighten it into the pedal thread. If you have the correct pedal, this should go in easily.
By doing this by hand to start with you avoid damaging the thread. If you notice excessive resistance check that you have identified the pedals and crank arms correctly and try again. A small amount of grease should be applied to the pedal threads in the crank arm, this should already be applied by us during the PDI process
Once you have tightened the pedals as much as you can by hand use the 15mm spanner and tighten them further. When installed correctly, pedals are self-tightening, so you only need to tighten them with the spanner until you feel resistance (or to a torque setting if specified).
NOT FOLLOWING THESE INSTRUCTIONS COULD RESULT IN THE PEDAL PULLING OUT OF THE CRANK WHILE RIDING, WHICH WILL REQUIRE A REPLACEMENT CRANK: WHICH IS NOT COVERED UNDER ANY WARRANTY.

Seat post
The seat post is fitted during the PDI process and will have either grease or fibre grip on it. Do not clean this off yet as it is used to stop the seat post from becoming stuck.
Place the seat post in the bike and push down gently.
On the seat post, you will have a minimum insertion line. Make sure this is hidden in the frame before you tighten the seat clamp.
Tighten the seat clamp until you feel resistance 4-7NM. Some clamps will have a torque setting and should be adhered to.
Inflate your tyres
Tyres should already be pumped up, but it is always good to check to make sure they are pumped up correctly.
Make sure your pump is set to the correct setting before you start pumping.
Check the side of the tyre to find the minimum and maximum pressure of the tyre.
It should say “Maximum Pressure –PSI” or “Minimum Pressure –PSI”. This is the max and minimum and should not be exceeded.
Your Bike Is Now Ready To Ride and we hope you enjoy it.
Carry out a final preliminary check to ensure your bike is safe to ride – especially pulling the brakes hard as these are the things that stop you.
If you have any issues or problems, please contact the store HERE


